Bridal Mehndi Designs: A Practical Guide for Brides
Choosing bridal mehndi is easier when you plan coverage, timing, jewellery, photographs and personal details together. This practical guide helps brides turn scattered inspiration into one complete design.
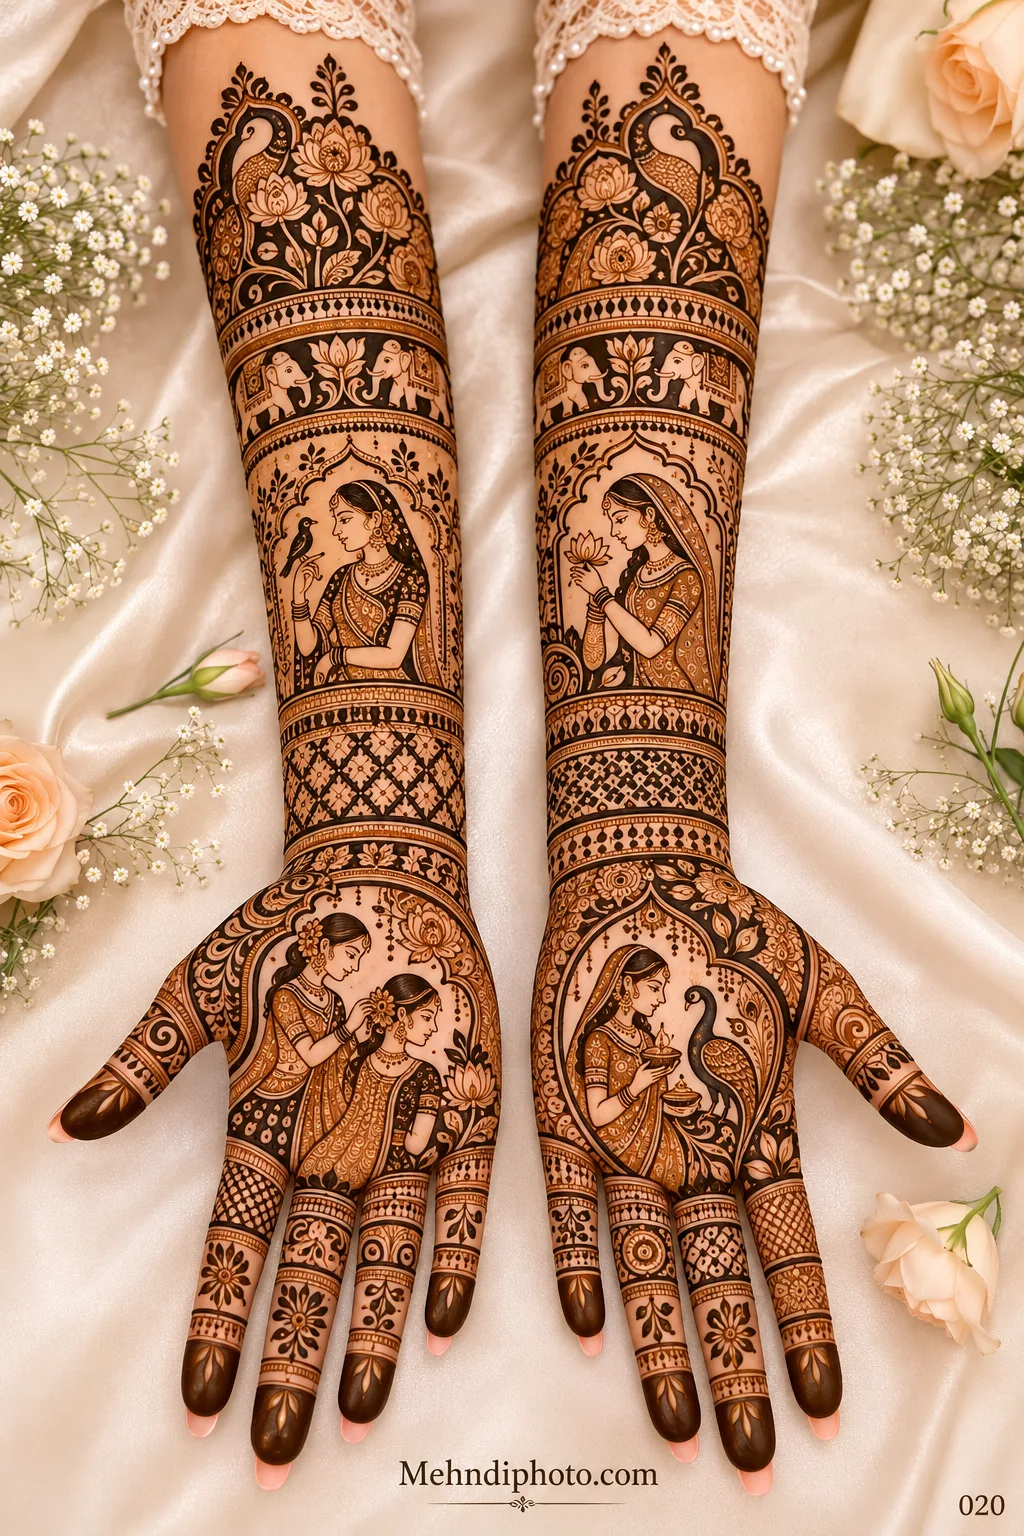
Most brides do not have trouble finding a beautiful mehndi design. The real problem starts after the screenshots pile up. One photo has the perfect fingers, another has a lovely bride-and-groom portrait, a third has the wrist border you want, and suddenly you are trying to fit five different ideas onto two hands.
Bridal mehndi looks best when it is planned as one complete piece rather than assembled motif by motif. The coverage, outfit, jewellery, wedding schedule and even the way you want your hands to look in close-up photographs all affect the final design. This guide is about making those decisions before you sit down with the cone.
Start with your wedding schedule, not the design
Before choosing paisleys, portraits or jaali, decide when the mehndi session can realistically happen. Natural henna usually looks orange when the paste first comes off and continues to deepen over the next day or two. For that reason, many brides schedule their main bridal application roughly two days before the wedding ceremony.
The session itself can be long. Medium bridal coverage may take a few hours, while detailed work extending well up the forearms and onto the feet can take most of an afternoon or evening. Complexity matters just as much as coverage: tiny portrait work and dense miniature filling are slower than large florals or open jaali.
Plan a proper block of time instead of squeezing mehndi between salon appointments. Eat beforehand, use the washroom, wear something comfortable with sleeves that will not brush wet paste, and keep somebody nearby who can handle your phone, drinks and last-minute wedding calls.
Choose the coverage before choosing the pattern
Two brides can save the same reference photo and still need completely different versions of it. A sleeveless blouse can carry a long forearm design beautifully; a bride wearing fitted full sleeves may be happier spending that same application time on richer palms and feet.
Think about coverage in four practical levels:
- Hand and wrist: elegant for intimate weddings, civil ceremonies, destination events or brides who genuinely prefer a lighter look.
- Mid-forearm: a useful middle ground. It feels bridal without disappearing under bangles and usually leaves enough room for larger motifs to breathe.
- Near the elbow: the classic full bridal look, especially effective with short sleeves, sleeveless blouses and traditional chooda styling.
- Hands plus feet: gives the complete bridal finish even when the arm design itself is not extremely long. A coordinated foot pattern also shows beautifully with lehengas, sarees and open footwear.
There is no rule that says more coverage is automatically more bridal. Clean composition matters more than the number of inches covered.
Plan the hand in zones
A strong bridal design has rhythm. The eye should move from the fingertips to the palm, through the wrist and into the forearm without hitting a random collection of unrelated shapes.
Fingertips
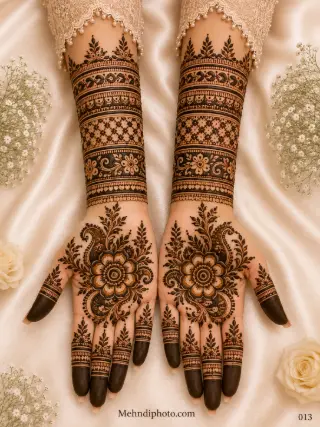
Decide early whether you want filled tips, patterned tips or mostly open fingers. Filled tips create a traditional, high-contrast finish. Fine bands and leafy trails feel lighter and allow rings to stand out.
Palm
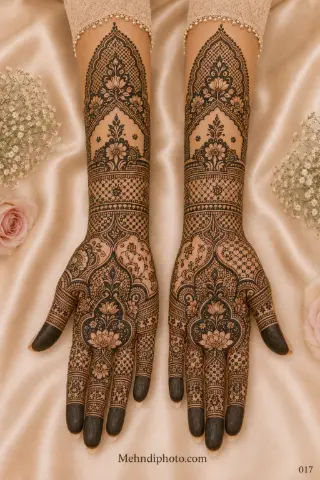
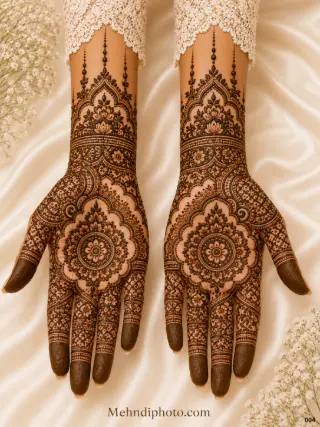
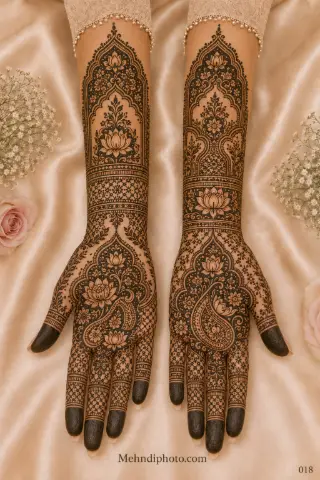
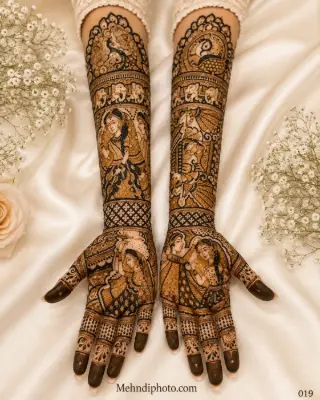
The palm is where a hero motif belongs. It may be a lotus, mandala, bride-and-groom portrait, Radha-Krishna scene, peacock pair or a carefully built geometric centre. One strong focal point is usually more memorable than several small competing ones.
Wrist
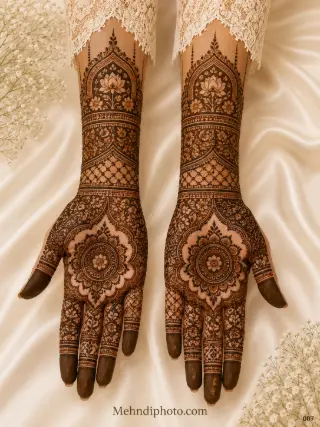
The wrist is the transition zone, and it is where rushed designs often look cut off. A cuff, scalloped border, architectural arch or floral band can connect the palm to the forearm without creating a hard break.
Forearm
Use the extra space for movement. Long paisleys, floral trails, jaali panels, wedding scenes and personalised elements sit more comfortably here than when they are squeezed into the palm.
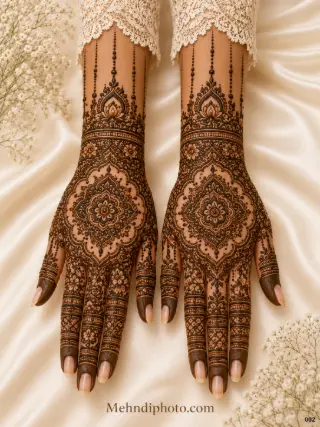
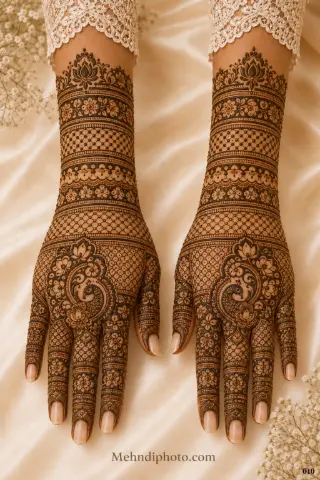
Browse the bridal mehndi gallery with this zoning idea in mind. Instead of asking “Do I like this whole design?”, notice which part of each design is doing the work.
Pick one visual language
Bridal mehndi can be detailed without looking chaotic. The easiest way to keep it coherent is to choose one main visual language and let the smaller motifs support it.
- Traditional storytelling: dulha-dulhan portraits, doli, baraat details, palace arches, elephants, peacocks and wedding rituals. Best when you want the hands to tell a personal story.
- Lotus and floral: softer and easier to coordinate with almost any bridal outfit. Large lotus centres also remain readable in photographs.
- Jaali and geometry: structured, refined and especially good for the back of the hand and forearm. It pairs well with heavily embroidered outfits because the repetition feels intentional rather than busy.
- Indo-Arabic: combines flowing floral movement with finer Indian filling. It suits brides who want visible skin between motifs without going fully minimal.
- Minimal bridal: clean spacing, selected finger work, a strong central motif and a finished wrist. It can look completely bridal when the composition is deliberate.
If you love several styles, choose one as the base and borrow only one or two elements from the others. That keeps the result personal without turning the hand into a mood board.
Front and back should feel related, not copied
Your palms and the backs of your hands appear in different wedding moments. The palms show when you open your hands for portraits or rituals; the back hand appears naturally while holding your dupatta, bouquet, kalire, phone or your partner's hand.
They do not need identical layouts. In fact, repeating the same large motif on both sides can feel heavy. A better approach is to repeat a small design vocabulary: the same lotus petal shape, the same border treatment, a matching jaali pattern or the same style of finger bands.
For example, a portrait-led front hand can be paired with a cleaner back hand built around jaali and wrist jewellery motifs. The two sides still belong together, but each has its own job.
Let the outfit and jewellery influence the layout
Bring a photograph of your wedding outfit and jewellery to the mehndi artist if possible. This is not about copying the embroidery onto your skin. It is about avoiding clashes in proportion.
If your blouse has heavy three-quarter sleeves, an extremely dense design running underneath them may never be seen. If you are wearing a large chooda stack, leave a neat finishing point where the bangles begin instead of hiding the most detailed part of the design underneath them.
Engagement and wedding rings matter too. If a statement ring will sit on the ring finger, a little negative space around that area can make both the jewellery and the henna look better. The same principle works for haath phool: treat the jewellery as part of the composition rather than something added afterwards.
Design for photographs as well as close-up detail
Bridal mehndi is often judged from six inches away while the artist is working, but most wedding photographs are taken from much farther back. Extremely fine filling can be impressive in person and disappear into one dark patch on a phone screen.
Ask for a mixture of scales: a few bold motifs that are readable from a distance, medium borders that organise the hand, and fine details that reward a close-up. Open skin between dense sections is useful because it creates contrast.
This matters especially for portraits. A tiny face squeezed into a crowded palm may lose expression once the stain darkens. If a bride-and-groom or deity portrait is important to you, give it enough clean space and ask the artist to show you examples of healed stains, not only fresh paste.
Personalise the design, but give the details room
A hidden initial is still charming, but bridal mehndi can carry much more than initials now: a wedding date, city skyline, favourite flower, pet silhouette, proposal location, musical symbol, meaningful phrase or a tiny object connected to how you met.
The trick is restraint. Two or three personal elements usually feel more special than ten. Decide which one should be obvious and which ones can be hidden for your partner to find. If everything is a secret detail, none of it gets enough visual importance.
Write your must-have symbols down before the appointment. Wedding days are busy, and “we forgot the initials” is an avoidable disappointment.
How to brief your mehndi artist clearly
An artist can work far better from a clear brief than from a camera roll of fifty unrelated screenshots. Before the appointment, narrow your references down to around five useful images.
- One image for overall coverage and density.
- One for the palm focal motif.
- One for the back-hand layout.
- One for finger treatment.
- One for any personalised or portrait detail.
Then explain what you do not want. Some brides dislike filled fingertips, human portraits, heavy jaali, very thick Arabic outlines or too much blank skin. Saying this beforehand is much easier than changing direction after half the hand is complete.
Also confirm practical details: how many artists will work, the expected sitting time, whether feet are included, what kind of natural henna paste is used, and whether the artist needs you to provide reference images in advance.
A simple bridal mehndi timeline
A week or more before
Finalise the artist, coverage and key references. If you have sensitive skin or are trying a new henna product, discuss a small patch test in advance. Avoid last-minute experiments with “instant black” cones; natural henna develops gradually and should not need harsh additives to look dark.
The day of application
Wash hands and feet and leave them free from lotion, oil and heavy skincare. Wear easy, loose clothing. Keep the room comfortable and arrange food, water and help before the first line is drawn.
After the paste dries
Follow your artist's aftercare instructions and give the stain time to mature. Scraping the paste rather than washing it straight off helps protect the early stain, and unnecessary water exposure immediately afterwards can make the result lighter.
The following day
Do not panic if the colour is not yet at its deepest. Natural henna continues oxidising after the paste is removed. This is why the application date matters as much as the cone.
What makes a bridal design feel expensive?
It is rarely the amount of filling. The most polished work has clean line weight, confident spacing, symmetrical areas where symmetry is intended, smooth transitions at the wrist, and a clear hierarchy between big motifs and tiny details.
A beautifully drawn lotus with space around it can look more refined than an arm filled edge to edge with unrelated motifs. The same is true of portrait work: likeness, placement and framing matter more than adding extra faces simply because there is room.
When comparing references, look past the first impression and zoom in on the joins. Are borders clean? Do fingers end neatly? Does the design become awkward near the wrist? Those small construction details are what separate a strong bridal composition from a busy one.
Frequently asked questions
How long does bridal mehndi take?
There is no single correct number. Coverage, line density, portraits, feet and the number of artists all change the sitting time. A medium design can take a few hours; highly detailed hands, forearms and feet can take much longer. Ask your artist for an estimate based on the exact reference and coverage you have chosen.
Do bridal feet have to match the hands?
No. They should feel coordinated, not copied. Repeating one motif family or border style is enough. Feet often look cleaner with stronger geometry and slightly larger motifs because the viewing distance is greater. You can browse leg and foot mehndi ideas separately and then carry one element into the hand design.
Can a minimal design still look bridal?
Absolutely. Bridal comes from intention, finish and styling, not only density. A clean palm motif, elegant fingers and a finished wrist paired with chooda, rings and wedding attire can look more sophisticated than a pattern you chose only because it covered more skin.
Should I copy one reference exactly?
You can, but many brides get a better result by choosing one reference as the main structure and changing only a few details. Hand shape, arm length and jewellery differ from the person in the photograph, so a good artist may need to adjust spacing while keeping the character of the design.
How many references should I show the artist?
Five focused references are usually more useful than dozens of screenshots. The goal is not to show everything you have liked; it is to communicate the design you have decided to wear.
Choose the design you will still like after the trend passes
Your bridal mehndi will fade from your skin, but it will stay in your wedding album. That is a good reason to choose the design that feels like you rather than the one that happens to be everywhere this month.
Start by deciding the coverage and the mood. Pick one hero motif, keep a few personal details, make room for your jewellery, and give the artist a short, clear brief. Once those decisions are made, choosing the actual pattern becomes much easier.
When you are ready to collect references, explore the full Bridal Mehndi collection. Save the designs for their specific strengths — palms, fingers, wrists, portraits or spacing — and build one bridal look that belongs together from fingertip to forearm.