Front Hand Mehndi Designs: A Complete Guide for Every Occasion
Front hand mehndi is the first thing everyone notices — in photos, in greetings, in every festival selfie. This guide walks you through simple and bridal front hand designs, Indian and Arabic styles, what suits your hand shape, and the small application and aftercare habits that give you a deep, long-lasting maroon stain.

In most Indian homes, mehndi season never really ends. There is always a Karwa Chauth coming, a cousin's engagement, a Teej fast, a Diwali evening or an Eid morning. And whenever the henna cone comes out, the first question is almost always the same — what should I put on my front hand?
The front hand, the side that faces outward when you fold your hands or hold a thali, is the part everyone sees. It shows up in every photograph, every video call and every family group photo. That is exactly why choosing the right front hand mehndi design matters more than people think.
Why front hand mehndi gets the most attention
When you greet someone with folded hands, when you serve food, when you hold your dupatta or raise your hand for a photo, the front of the hand is on display. A design here does not need to be heavy to look good. Even a single vine running from the wrist to the middle finger can look complete if the spacing is clean.
This is also the easiest surface to work on if you are applying henna yourself. The palm and fingers are naturally in front of you, so your hand stays steady and your lines stay smooth. Beginners almost always find front hand practice easier than the back hand.
Simple front hand mehndi designs for everyday and small functions
Simple does not mean plain. Some of the most elegant patterns in our gallery use only four or five motifs repeated well.
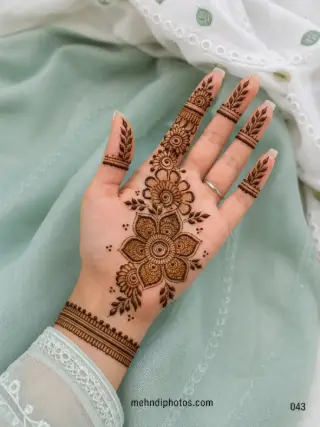
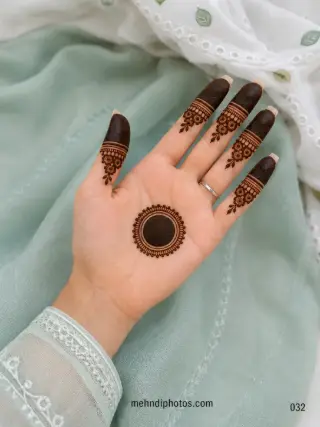
- Wrist bracelet with a finger trail — one decorated band at the wrist and light motifs on two or three fingers. Takes ten to fifteen minutes.
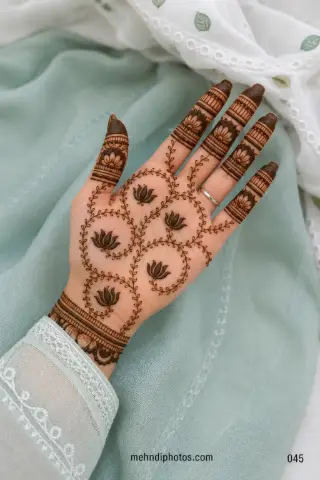
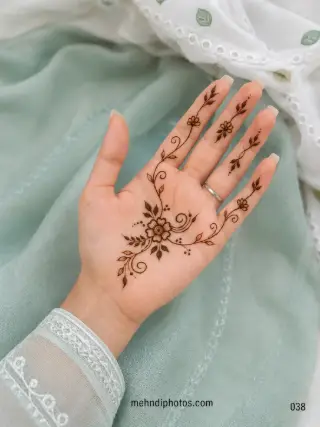
- Single flower vine — a curved stem with flowers and leaves running diagonally across the palm.
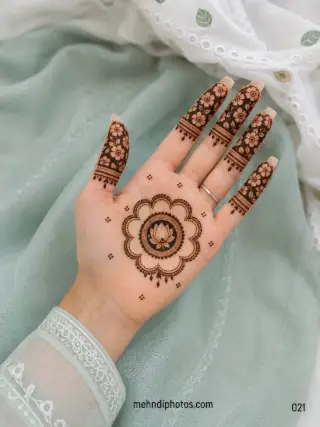
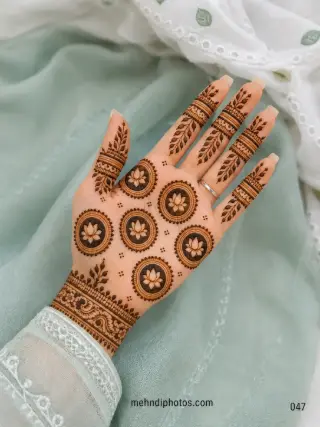
- Small centre mandala — a round motif in the middle of the palm with plain space around it. Very popular for office days and college functions.
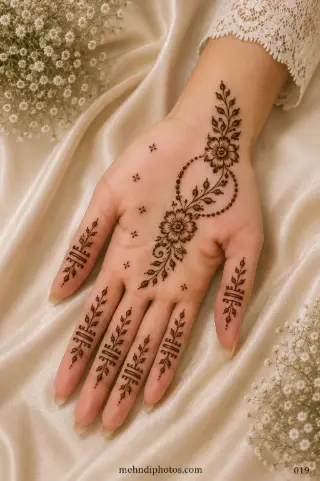
- Scattered motifs — small flowers, dots and buttis placed with gaps. Forgiving for beginners because mistakes hide easily.
- Gol tikki — the classic round palm design our grandmothers loved, still the fastest full-looking option.
If you want more of these, browse the easy mehndi collection and the finger mehndi designs — both work beautifully as light front hand looks.
Bridal front hand mehndi designs
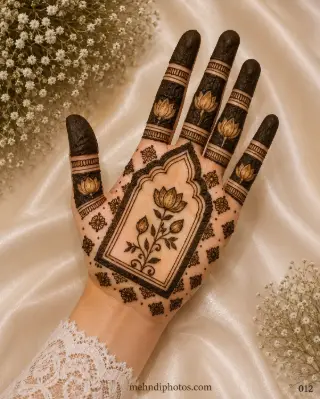
Bridal front hand mehndi is a different world. Here the palm becomes a small canvas of stories: a central round mandala, jaal net-work filling the spaces, paisleys curving towards the fingers, fine checks, and often the dulha-dulhan faces or the groom's initials hidden somewhere for him to find.
A typical Indian bridal front hand includes a full palm mandala or a portrait panel, dense finger caps, a decorated wrist border, and shading that continues up the forearm. It usually takes three to six hours per side, so brides normally get mehndi done a full day or two before the wedding to let the colour deepen.
Our bridal mehndi gallery has full-coverage designs you can show your artist directly — most artists prefer a reference photo over a description.
Indian traditional style vs Arabic style
Both styles look stunning on the front hand, but they behave very differently.
Indian traditional
Dense, symmetrical and detail-heavy. Fine lines, filled fingertips, mandalas, jaal, peacocks, temple motifs and human figures. It covers most of the skin and takes longer, but the finished hand looks rich even from a distance.
Arabic
Bold, flowing and open. Thicker strokes, big flowers, diagonal trails from the index finger to the wrist, and plenty of bare skin between motifs. It is quicker to apply, dries faster and photographs beautifully. See the Arabic mehndi collection for this style.
Many brides now mix the two — an Indian-style detailed palm with an Arabic-style flowing forearm.
Choosing a design for the occasion
- Karwa Chauth — married women usually prefer a rich but not bridal-heavy design. A round palm mandala with a wrist border and the husband's initial hidden in the pattern is the classic choice.
- Teej — green and festive, so lighter floral and leaf patterns with finger trails suit the mood.
- Diwali — diya, lotus and rangoli-inspired motifs on the palm look perfect against traditional wear.
- Eid — Arabic floral trails and clean geometric bands are the favourites, applied on Chand Raat night.
- Engagement — a medium design with a decorated ring finger, so the ring stands out in close-up photographs.
- Everyday and office — a small motif on the wrist or one finger is enough.
Matching the design to your hand shape
This one small adjustment makes a big difference.
- Long, slim hands — horizontal bands, wide mandalas and wrist bracelets add balance.
- Broad or short palms — vertical vines and diagonal trails visually lengthen the hand.
- Small hands — keep motifs fine and leave breathing space; heavy filling can look crowded.
- Long fingers — full finger caps and ring patterns look excellent and are worth the extra time.
Application tips for a clean design
- Wash your hands with soap and dry them fully. Do not apply any oil, lotion or cream before henna.
- Use a fresh cone with a fine tip. Old, dry paste gives broken lines and a weak stain.
- Rest your elbow on a table and work from the wrist upward, so your hand never drags over wet paste.
- Outline the design first, then fill. Sit somewhere warm — henna releases colour better on warm skin.
- Keep a pin or cotton bud handy to lift small mistakes before the paste sets.
Aftercare for a dark maroon stain
- Let the paste stay on for at least six to eight hours; overnight is ideal for bridal work.
- Dab a little lemon and sugar mix once the paste is touch-dry — do not soak it.
- Scrape the dry paste off with a blunt edge. Never wash it off with water.
- Avoid water for the next twelve hours, then rub in mustard oil or balm.
- Warmth deepens the colour — holding your hands over cloves roasting on a tawa is the old, reliable trick.
- The stain reaches its darkest shade around forty-eight hours after removal, so do not judge the colour immediately.
Frequently asked questions
How long does a simple front hand mehndi design take?
Ten to twenty-five minutes per hand for most simple patterns. A gol tikki or single vine can be finished in under fifteen minutes.
Should I get front hand or back hand mehndi done first?
Artists usually start with the front hand, because it is the visible side and needs the freshest paste and the steadiest hand.
Why is my mehndi colour light?
Usually old paste, too little time on the skin, washing it off with water, or cold skin. Fresh henna plus eight hours plus warmth almost always fixes it.
How many days before the wedding should bridal mehndi be applied?
One to two days before. This gives the stain time to darken to its full maroon shade for the wedding photographs.
Is chemical black cone safe?
No. Black cones often contain PPD, which can cause burns and long-term skin reactions. Always use natural henna paste, which stains orange first and darkens to maroon on its own.
Where to find your next design
Start with the full front hand mehndi gallery, then explore bridal, Arabic and easy collections, or browse everything by theme on the categories page. Save two or three references before your appointment — your artist will thank you, and you will get exactly the hands you imagined.