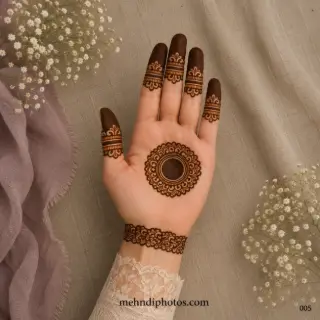
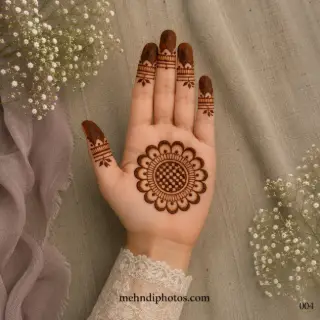
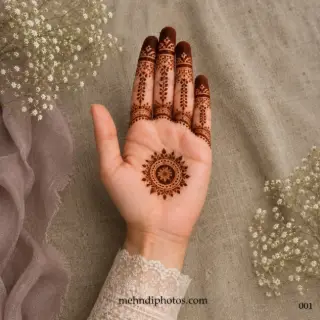
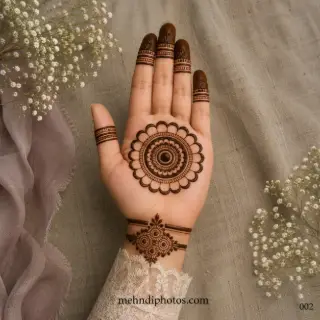
Gol Tikki Mehndi Designs: Simple, Bridal & Traditional Ideas
Gol tikki mehndi is one of the easiest ways to make a palm look complete without filling every inch. This guide explains simple, floral, bridal and modern tikki styles, how to size and centre the round motif, what to do on the fingers, and how to choose a balanced design for festivals, engagements and weddings.
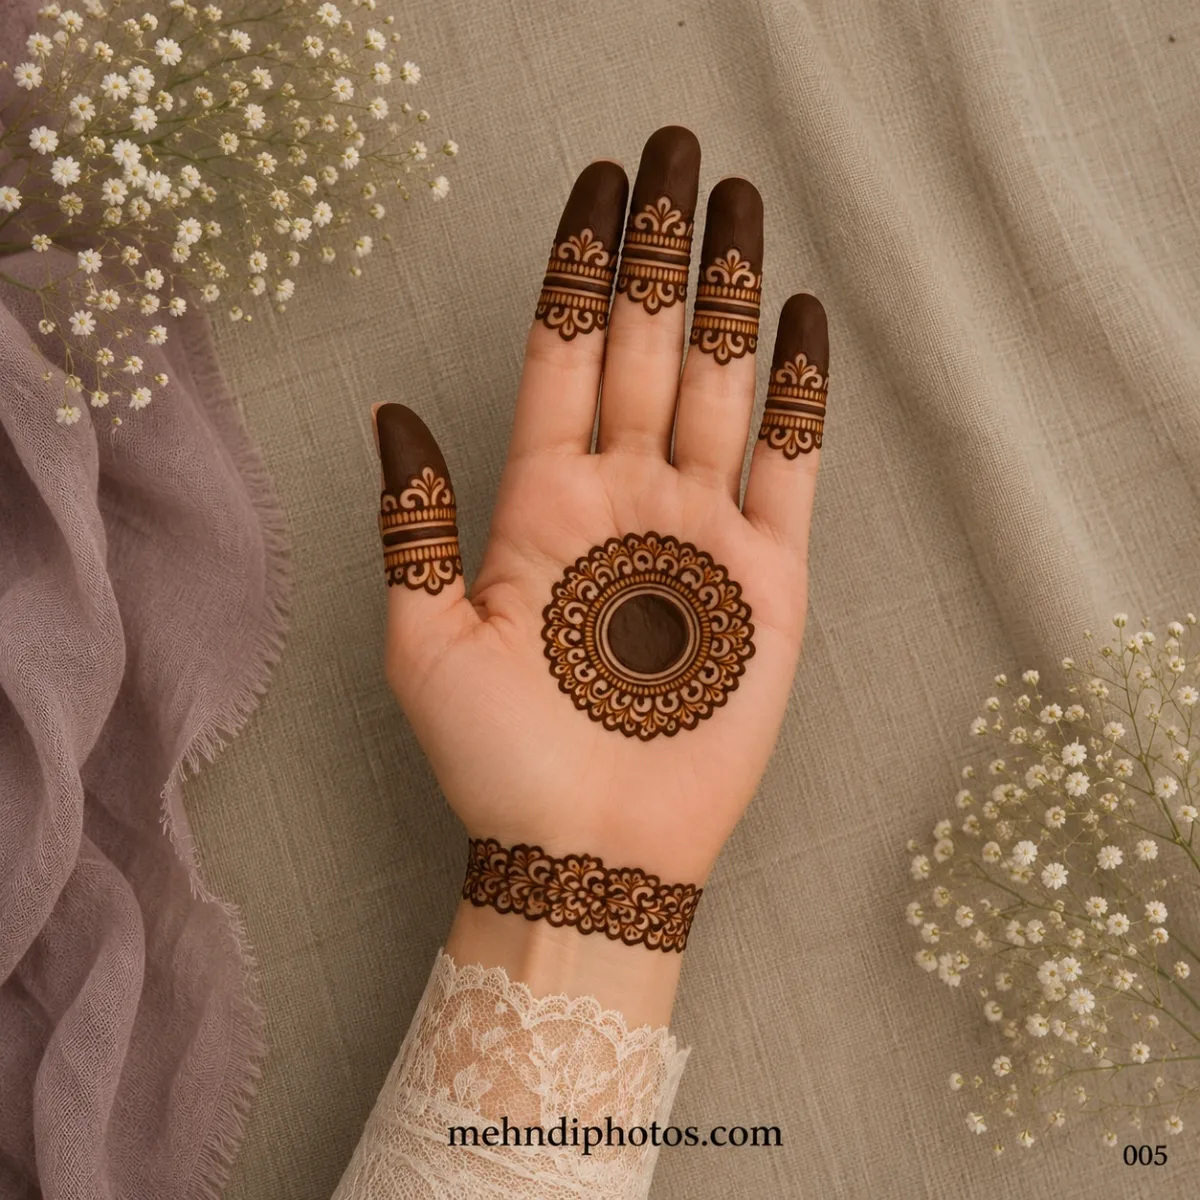
Gol tikki mehndi has stayed popular for a simple reason: one well-placed round motif can make the whole hand look finished. You do not need dense coverage, complicated storytelling or dozens of tiny fillers. A clean centre, a balanced border and thoughtfully decorated fingers are often enough.
That simplicity is also what makes gol tikki designs harder to fake. When the palm is mostly open, the eye immediately notices whether the circle is centred, whether the spacing is even and whether the finger work matches the main motif. A good design therefore depends more on proportion and placement than on the number of details.
This guide explains how to choose a gol tikki mehndi design that suits your hand, occasion and skill level, including simple tikki patterns, floral mandalas, fuller bridal versions, finger combinations and practical ways to keep the final look balanced.
What is a gol tikki mehndi design?
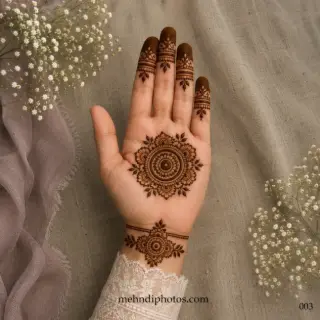
Gol tikki mehndi is built around a circular or nearly circular motif, usually placed in the centre of the palm. The centre may be a solid dot, a small flower, a ring, a geometric shape or a tiny mandala. Around it, the artist adds one or more layers of petals, scallops, leaves, dots, jaali details or decorative borders.
The word “gol” simply refers to the round shape. In practice, the final design can be very minimal or highly detailed. Some tikki designs stop after two or three rings. Others expand across most of the palm and connect to finger patterns or a wrist band.
Because the structure is clear, this style works well for people who want traditional-looking mehndi without full-hand coverage.
Why gol tikki mehndi still works so well
Trends in mehndi change quickly, but round palm designs keep returning because they solve several practical problems at once.
- They photograph clearly. A central motif is easy to see even in wider hand photos.
- They work with jewellery. Open skin around the design leaves room for rings, bangles and bracelets to stand out.
- They can be scaled. The same basic idea can be tiny and minimal or extended into a richer bridal pattern.
- They suit many occasions. A light tikki works for festivals and family functions, while a layered version can suit an engagement or wedding event.
- They are easy to personalise. Finger bands, flowers, initials, dots and wrist details can change the mood without changing the central structure.
That flexibility makes gol tikki one of the most useful styles to save when you are not sure how much mehndi you want.
Simple gol tikki mehndi designs
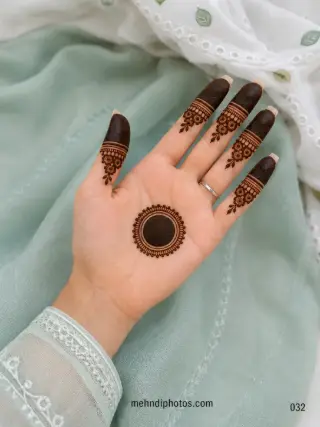
A simple tikki usually has a small centre and one or two decorative rings around it. The best simple versions do not try to fill the palm. They rely on neat spacing and a strong outline.
A beginner-friendly structure is:
- Make a small centre circle or flower.
- Add one ring of petals or curved scallops.
- Leave a narrow gap of skin.
- Add a dotted or leafy outer border.
- Keep the fingers light with two or three simple bands.
This gives the design enough structure to look intentional without requiring perfect micro-detail.
For a very minimal result, stop after the main palm tikki and decorate only the fingertips. If you want slightly more coverage, add a small floral or bracelet-style motif near the wrist.
Floral gol tikki mehndi
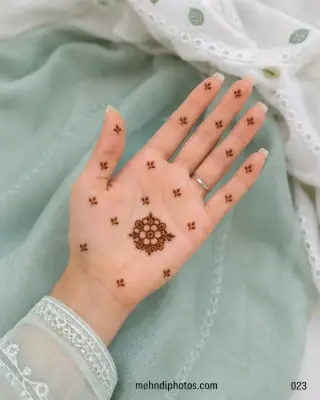
Floral tikki designs soften the strict geometry of a circle. Instead of building the design from repeated lines only, the artist can create a flower at the centre and let the petals form the first round layer.
Common floral approaches include:
- A lotus-inspired centre
- A five- or six-petal flower
- Two rings of alternating petals
- Leaf clusters around the outer edge
- Small buds or dots between petals
Floral versions are especially useful if your circle control is not perfect. Slight differences between petals can still look natural, while a purely geometric mandala exposes every uneven gap.
Mandala-style tikki designs
People often use “gol tikki” and “mandala mehndi” almost interchangeably because both use a circular centre. The difference is usually in complexity. A mandala-style tikki often has more layers, finer repetition and a stronger radial structure.
If you like this look, focus on the rhythm of the rings rather than adding detail randomly. For example, a solid centre can be followed by a petal ring, then dots, then leaves, then a scalloped edge. Each ring should have its own visual job.
When every layer uses the same tiny pattern, the design can look crowded. Alternating dense and open rings gives the mandala more depth.
Bridal gol tikki mehndi
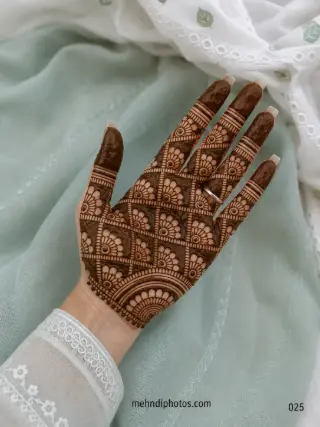
Gol tikki can also work for brides who do not want a completely packed palm. The bridal version is usually larger, more layered and connected to the surrounding hand through decorative finger work, wrist cuffs or side motifs.
A richer bridal tikki may include jaali sections, lotus petals, paisleys, fine dots, peacock-inspired curves or jewellery-like borders. The palm can still keep a small amount of negative space so the central circle remains visible.
If the rest of your bridal mehndi is already very dense, a strong round palm centre can actually improve the overall composition. It gives the eye one clear focal point instead of turning the whole hand into one continuous texture.
For fuller wedding references, compare tikki ideas with the bridal mehndi collection before deciding how much coverage you want.
How big should the tikki be?
There is no single correct size. The right proportion depends on the palm and the amount of empty space you want around it.
For a minimal design, a tikki that takes roughly one-third of the palm width can look delicate. For a more traditional or festive look, the round motif may extend across about half of the palm. Large layered mandalas can go wider, but they should still leave enough room near the base of the fingers and wrist so the circle does not feel squeezed.
Small hands usually benefit from fewer outer rings. On a broad palm, an overly tiny tikki can look lost unless the fingers or wrist add enough supporting detail.
Instead of copying the exact size from a reference photo, copy the proportion of the design to the hand.
How to centre a gol tikki properly
A round design looks most balanced when its centre is planned before the outer rings begin. Do not start from a large flower and hope it lands in the middle.
Visually mark the centre of the palm first. Check the space from that point to the index side, little-finger side, finger base and wrist. The palm is not a perfect square, so mathematical centring is not always the same as visual centring.
For most front-hand designs, the tikki should feel centred in the visible palm area rather than the entire hand. Once the centre is placed, build each ring evenly around it.
If you are applying mehndi yourself, pause after every full ring and rotate your hand. A design can look even from one angle but noticeably stretched from another.
What should you do on the fingers?
The fingers decide whether a tikki design looks traditional, minimal or modern. They do not need to copy the palm motif exactly.
Simple finger bands
Two or three horizontal bands with dots, tiny leaves or small arches are easy to apply and pair well with almost any tikki.
Dark fingertips
Filled fingertips create strong contrast against an open palm. This is one of the most traditional-looking combinations and works particularly well when the tikki itself is simple.
Leaf trails
A short leafy vine on one or two fingers can make the design feel lighter and more contemporary. The other fingers can stay minimal.
Mixed finger patterns
All five fingers do not need identical work. A coordinated mix of bands, dots and leaves often looks more natural and is easier to apply cleanly.
If you want to focus on smaller patterns, browse the finger mehndi collection and choose details that support the round palm motif rather than compete with it.
Should the wrist be decorated?
A wrist motif is optional. In a very clean tikki design, leaving the wrist completely open can look elegant. If the palm feels visually heavy, however, a small wrist element can balance the composition.
Good options include a thin bracelet line, a floral band, a small round motif or a short leafy border. Keep it narrower than the palm design unless you intentionally want a heavier festive look.
A large wrist cuff plus a large palm tikki can make the centre section between them feel cramped, especially on a short hand.
Gol tikki for front hand vs back hand
The classic placement is the front palm because the broad surface naturally supports a circular motif. On the back hand, a round design can still work, but the shape often needs to be slightly smaller or adapted around the knuckles and tendons.
For front-hand inspiration, see the front hand mehndi gallery. If you use a round motif on the back hand, keep enough space for rings and avoid placing the outer edge too close to the knuckles.
Traditional gol tikki designs
A traditional look usually comes from strong symmetry, repeated petals, dark fingertips, dots and simple finger bands. The pattern does not need to be extremely dense.
One of the most recognisable combinations is a circular palm centre with filled fingertips and open skin between the two. This contrast gives the design a classic character even when the actual motif is quite simple.
Traditional does not mean old-fashioned. The same structure can look very polished with cleaner spacing, finer outlines and fewer filler elements.
Modern gol tikki mehndi
Modern versions often use more negative space and fewer repeated rings. The circle may be made from leaves, broken arcs, geometric lines or an oversized flower rather than a conventional mandala.
You can also shift the tikki slightly off-centre, connect it to one finger with a thin trail or leave most fingers bare. These variations keep the recognisable round focal point while making the overall hand feel lighter.
For engagement or party looks, this approach can work especially well because rings and nail styling remain visible.
Gol tikki mehndi for engagement
For an engagement, the palm design should complement the ring rather than compete with it. A medium-size tikki with elegant finger bands gives the hand enough detail for close-up photos while keeping the ring area readable.
If your engagement ring is large or has a detailed setting, leave extra skin around the ring finger. You can decorate the other fingers slightly more and keep the ring finger simple.
For more ring-ceremony ideas, compare this style with the engagement mehndi collection.
Gol tikki mehndi for Eid and festivals
Tikki designs are practical for festive days because they can be completed quickly and still look traditional. A simple palm mandala with finger bands is enough for Eid, Diwali, Teej, Karwa Chauth or a family celebration.
If several people are getting mehndi at home, use the same basic centre structure and change the outer border or finger pattern for each hand. This keeps application fast without making every design identical.
Easy gol tikki for beginners
Beginners should avoid starting with ten tiny concentric rings. A larger, simpler motif is easier to control.
Try this sequence:
- Draw one small centre dot.
- Add six large petals.
- Place one dot between each petal.
- Add one outer scalloped line.
- Finish with a ring of spaced dots.
This gives you a complete circular design with only a few repeated movements. Once that feels comfortable, add another leaf or petal ring.
The biggest beginner mistake is making the first centre too large. Every outer layer then pushes the design toward the edges of the palm. Start smaller than you think you need.
Common mistakes that make a tikki look uneven
Starting off-centre
A small placement error becomes more obvious with every outer ring. Mark the centre visually before you begin.
Changing the spacing between rings
If one side has a narrow gap and the other has a wide one, the circle starts to look stretched. Complete one full ring before moving to the next.
Using too many tiny details
A round design needs clear layers. Too many fillers can blur those layers together.
Decorating fingers too heavily
If the palm is the focal point, dense finger work can make the entire hand feel top-heavy. Match the weight of the fingers to the size of the tikki.
Trying to repair every imperfect curve
Repeatedly thickening one side can make the circle even more uneven. A small dot or leaf border often disguises a minor difference better than tracing over the same line.
How to make the design look cleaner in photos
For photographs, contrast matters more than microscopic detail. A defined outer border, visible gaps between rings and clear finger endings will usually read better than extremely fine work.
Keep nail polish, rings and bangles in mind before choosing coverage. If the hand already has detailed jewellery, a medium tikki with open skin can photograph beautifully.
When photographing the finished design, keep the palm flat enough that the circle does not distort. A slightly curved palm can make a perfectly round tikki look oval in the picture.
Choosing a reference that will actually suit your hand
Do not save a reference only because the motif itself is pretty. Look at the full composition.
- How large is the model's palm compared with yours?
- How much space is left around the tikki?
- Are the fingers long enough for the same number of bands?
- Does the design need perfect symmetry?
- Will rings or bangles cover part of it?
- How much application time do you have?
A design that fits your hand proportions will usually look better than a more complicated pattern copied at the wrong scale.
Final thoughts
Gol tikki mehndi proves that a hand does not need full coverage to look complete. The strongest designs usually have one clear centre, consistent spacing, controlled finger work and enough empty skin to let the round motif stand out.
If you want something quick, start with a small floral tikki and simple finger bands. For a festive or engagement look, use a medium mandala with a little more border detail. For bridal mehndi, expand the layers and connect the central motif to richer wrist and finger patterns without losing the circle as the focal point.
Browse the Gol Tikki Mehndi gallery, compare a few different sizes and save the design whose proportions are closest to your own hand. That small step makes it much easier for the finished mehndi to look balanced rather than simply copied.